

The Edinburgh Mouse Atlas Project: School Tutorial - Sectioning the Mouse Embryo
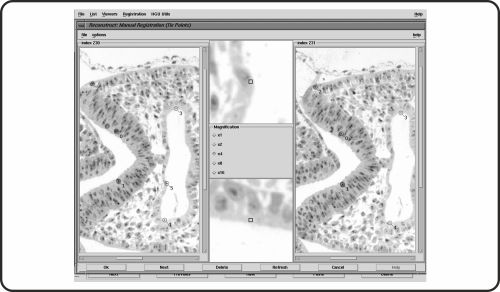 |
A 2D digital image is an 2D (x,y) array of numbers, or PIXEL values, which determine the colour to be shown on the screen. A 3D image is a 3D array (x,y,z) of voxel values. We build this 3D array by stacking up the 2D images of consecutive sections. When the embryo is sectioned we lose the alignment between sections. Also, each section will be deformed by cutting. To build our 3D image we realign or register the 2D images: that is, move and rotate each one then warp it to correct some of the distortions. The picture on the right shows a view of the program which can be used to register the images manually or automatically. This is done by embedding the embryo in wax or plastic resin (Araldite) then cutting the block using a microtome |
 |
This illustration shows the effect of warping. Each picture of the embryo has been made by digitally cutting vertically through a stack of section images - so each line in these images comes from a different section. The section images in the picture on the left have been aligned and still show jagged edges because of the distortion within sections. In the picture on the right the section images have been warped and the picture looks more smooth, like a real vertical section through an embryo. |